What is soldering?
Soldering is the joining of two metal surfaces mechanically and electrically, with the use of metal called solder. Solder secures the connection so it doesn’t break loose due to vibration or other mechanical forces. It also provides electrical continuity, so that the electronic signal can travel through the connection without interruption. The solder is melted using a soldering iron. Flux is used to clean and prep the surfaces, which allows the melted solder to flow (or “wet”) and bond with the metal surfaces.
What do I need to solder electronics?
When soldering an electronic connector to a contact point (often called a “pad”), you generally need the following:
- A soldering iron capable of reaching the melting point of the solder.
- Wire solder, with or without a flux core.
- Flux, if the wire solder does not include a flux core or if additional flux is needed.
What is a soldering iron?
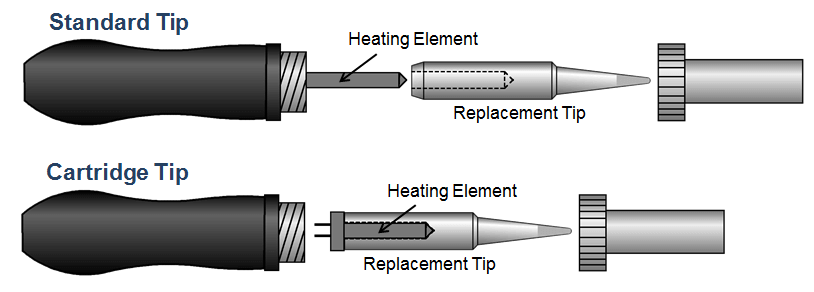
A soldering iron is a hand tool used to solder two metal surfaces together. At its simplest form, it consists of a metal tip, a heating element that brings the tip up to soldering temperature, an insulated handle to allow safe holding of the soldering iron, and a plug for either a wall outlet or the soldering station.
The soldering tip’s job is to transfer heat from the heating element to the work. It has a copper interior, which acts as an effective and efficient thermal conductor. It also has iron plating to protect the soft, corrosive-prone copper from flux and solder, and chrome-nickel plating to keep the flux from wetting up the tip.
Beyond that, there are options that provide better control over the soldering iron temperature and heat response (time it takes to heat up again after soldering). These include soldering tips, which are metal slugs that rest against the heating element, and others which are integrated with the heating element in a cartridge.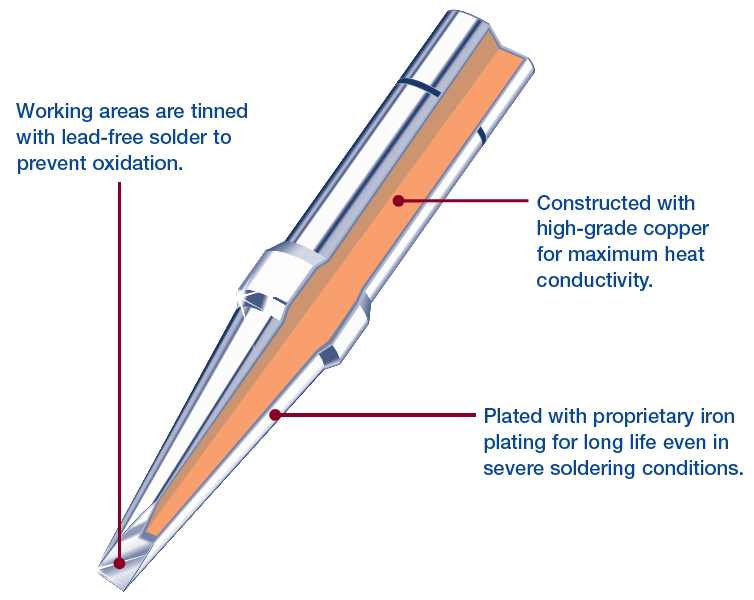
What is the difference between a soldering iron and a soldering station?
On the low end, most appropriate for hobbyists, a soldering iron may plug directly into the electrical wall outlet, which provides no control over soldering iron temperature. Just on or off. With a soldering station, the soldering iron plugs into the station for greater control over temperature, and other features like set-temperature memory, lock-out, etc.
What type of solder should I use?
While there is a large variety of different types of solder, at the most basic, you need to choose between lead or lead-free, the diameter of the wire, flux core or solid wire, and the type of flux.
- Lead or lead-free – Solder is generally a combination of metals, which are chosen for the best reliability and conductivity. Lead, often combined with tin, has been the mainstay of electronic soldering since its inception. Lead has a relatively low melting point and readily wets and flows, which makes the process faster, easier, and more fool-proof. Because of environmental and health concerns around, there has been pressure to move to lead-free solder, which is often a combination of tin and silver. Lead-free solders have a higher melting point and generally require more active or more concentrated fluxes (higher solids content) to achieve the same soldering performance as leaded solders. For typical manual soldering, if done properly, reliability between lead and lead-free solders should be about the same. For high-end electronics used in extreme environments (e.g. aerospace electronics), there are concerns with the tendency of bright tin in lead-free solder to crystallize and form tin whiskers -- thin wires of tin that can grow from the solder joints.
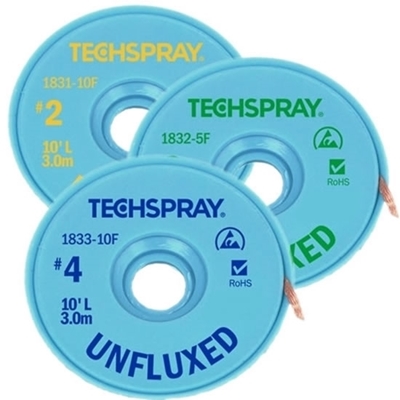
If you are repairing or assembling electronics for use in the US, lead solder is the easiest to work with and it forms the most reliable solder joints. The lower heat also generates less thermal stress on the rest of the PCB. If the end product is being shipped outside of the US, especially to Europe, you should consider lead-free solder. An exception might be for high-reliability electronics like those used in aerospace. In that case, check with the specifications and requirements of the end-user of the electronics. Lead-free may still be required, but there may be exemptions in place that allow for the use of lead solder. - Diameter of solder wire – Make sure you don’t confuse solder wire intended for plumbing with solder wire intended for electronics. Wire for plumbing will be much thicker, 2mm in diameter or higher. Electronics solder wire will be thinner, from 1.5mm down to 1/2mm, or even less. Match the diameter to the size of the connectors and contacts you are soldering. If the diameter of the wire solder is too small, you will be going through too much solder.Too large and it could be hard to maneuver around a dense PCB, thus increasing the chance of thermally stressing or even soldering other components that are unrelated to your repair.
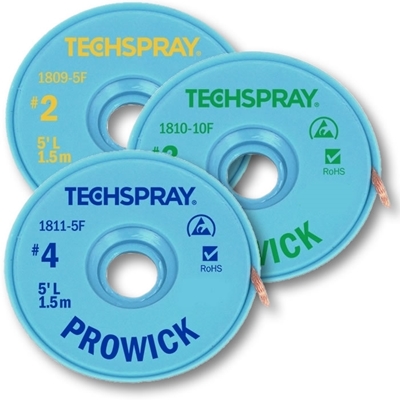
- Flux core or solid wire – Most wire solder comes with a flux core, so the flux will automatically activate and flow over the soldering area when the solder is melted. It is more convenient and efficient to work with. Solid wire can be used, with flux added by a brush, a bottle dispenser, or a pen dispenser. Unless a very specific flux is required that is not available as a wire solder core, flux core wire solder is generally recommended.
- Type of flux -- No-clean flux is a good choice for soldering where cleaning is to be avoided. The light residue can be left on the board, or removed with a flux remover. Rosin activated flux (RA) provides excellent solderability in a wide variety of applications. It is best to remove the residue after soldering for aesthetics and to avoid corrosion down-the-line. Rosin flux (R) or mildly activated rosin flux (RMA) can generally be left on the PCB after soldering unless aesthetics are a problem. Water soluble flux (OA) is a very active flux engineered to be removed easily with DI water, like in a batch or in-line system. It can also be removed with isopropyl alcohol (IPA). It is very important to clean off water soluble flux residues because they are highly corrosive.
You may also see options for “halogen-free” or “zero halogen”. These classifications are for companies that have green initiatives, or have to comply with halogen restrictions due to regulatory or customer restrictions. Halogens include chlorine, fluorine, iodine, bromine and astatine elements. These can come with trade-offs like cleanability, so if you aren’t required to eliminate halogens from your process, it is easier to stay with standard fluxes that contain halogens.
For an in-depth look at flux, check out the Chemtronics article "Choosing The Best Flux for High Quality Electronic Soldering".
Should I use lead or lead-free solder?
If you are repairing or assembling electronics for use in the US, lead solder is the easiest to work with and it forms the most reliable solder joints. The lower heat also generates less thermal stress on the rest of the PCB. If the end product is being shipped outside of the US, especially to Europe, you should consider lead-free solder. An exception might be for high-reliability electronics like those used in aerospace. In that case, check with the specifications and requirements of the end-user of the electronics. Lead-free may still be required, but there may be exemptions in place that allow for the use of lead solder.
What is flux?
Think of flux and a prepping agent for the soldering process. When joining two metal surfaces together with solder, there needs to be a good metallurgic bond, so that the solder joint doesn’t break loose and electrical continuity doesn’t fluctuate with mechanical, temperature, and other stresses. Flux removes any oxidation that may be present and slightly etches the surface to promote wetting. “Wetting” is the process of solder flowing over the surfaces of the contacts and the soldering tip, which is very important in the soldering process.
What type of flux should I use?
No-clean flux is a good choice for soldering where cleaning is to be avoided. The light residue can be left on the board, or removed with a flux remover. Rosin activated flux (RA) provides excellent solderability in a wide variety of applications. It is best to remove the residue after soldering for aesthetics and to avoid corrosion down-the-line. Rosin flux (R) or mildly activated rosin flux (RMA) can generally be left on the PCB after soldering unless aesthetics are a problem. Water soluble flux (OA) is a very active flux engineered to be removed easily with DI water, like in a batch or in-line system. It can also be removed with isopropyl alcohol (IPA). It is very important to clean off water soluble flux residues because they are highly corrosive.
You may also see options for “halogen-free” or “zero halogens”. These classifications are for companies that have green initiatives, or have to comply with halogen restrictions due to regulatory or customer restrictions. Halogens include chlorine, fluorine, iodine, bromine and astatine elements. These can come with trade-offs like cleanability, so if you aren’t required to eliminate halogens from your process, it is easier to stay with standard fluxes that contain halogens.
Do I need to add extra flux when soldering?
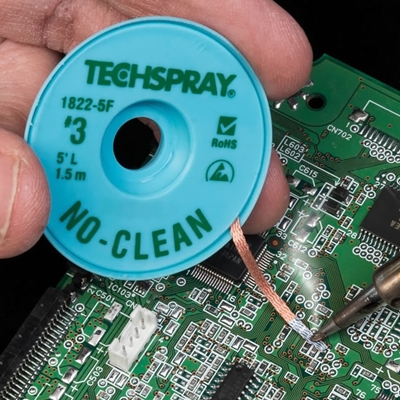
If soldering a simple connection, like 2 wires, or a thru-hole lead, the flux in a flux core solder should be enough. For more complex soldering techniques, like drag soldering multiple leads on a surface mount component, additional flux may need to be added. The flux is activated and consumed when it originally flows from the core. If the solder is worked further, like when you drag across multiple leads, you run the risk of cold joints or bridging without additional flux. While more flux seems like it should be better, take care not to over apply flux. Excess flux needs to be removed, especially if it isn’t fully activated by being heated to full soldering temperature.
Associated products:
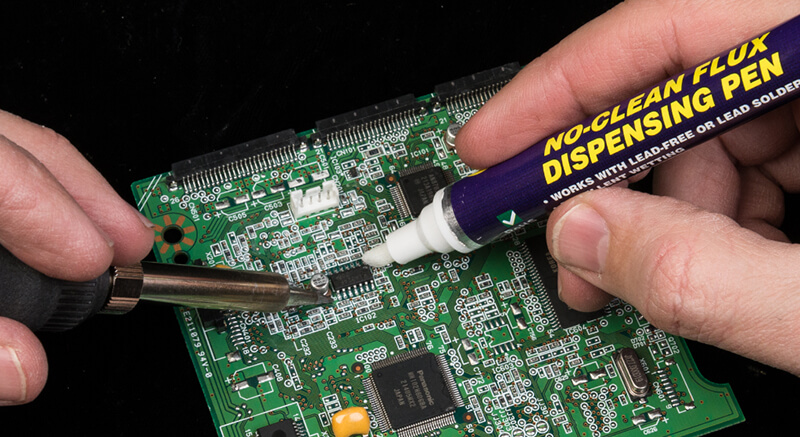
How do I apply extra flux?
Flux can be painted on with an acid brush, or applied with either a needle bottle dispenser, or a pen dispenser. While more flux seems like it should be better, take care not to over apply flux. Excess flux needs to be removed, especially if it isn’t fully activated by being heated to full soldering temperature.
Associated products:
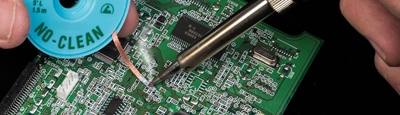
How do I solder?
- Make sure the surfaces to be soldered are clean.
- Turn on the soldering iron and set temperature above the melting point of your solder. 600°- 650°F (316°- 343°C) is a good place to start for lead-based solder and 650°- 700°F (343°- 371°C) for lead-free solder.
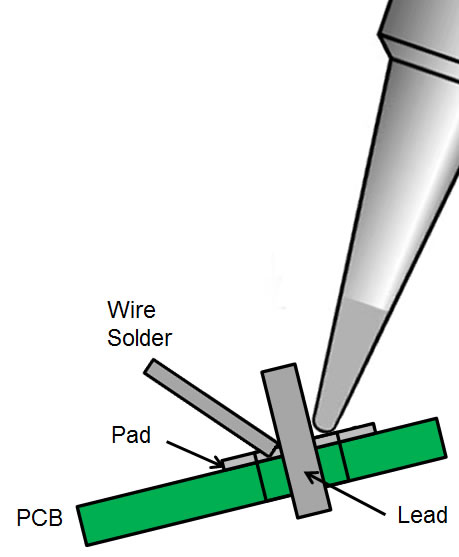
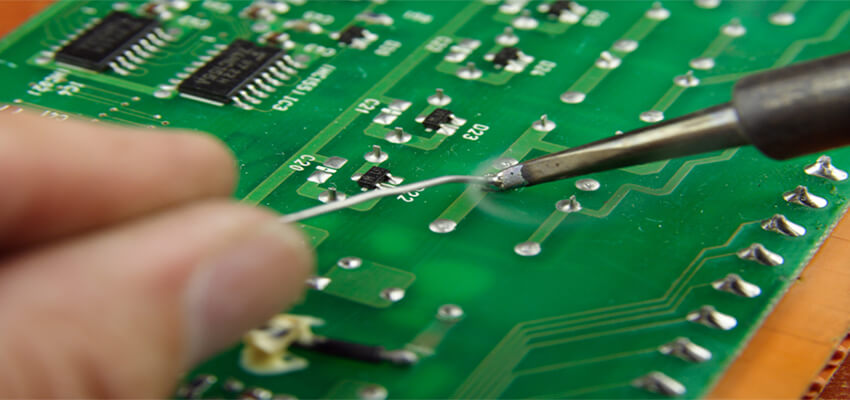
- Hold the tip against both the lead and contact point/pad for a few seconds. The idea is to bring both up to a soldering temperature at the same time.
- Touch the solder wire to the lead and contact point/pad a few times until solder flows around the lead and contact.
- Inspect the solder joint to make sure there is full coverage over the contact area and the lead. If it is a thru-hole lead, the hole should be filled and the solder joint forms a slight pyramid-like shape.
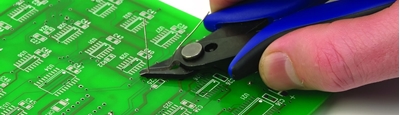
- If necessary, trim the lead with a shear lead cutter. Do not trim into the solder joint, which can damage the connection.
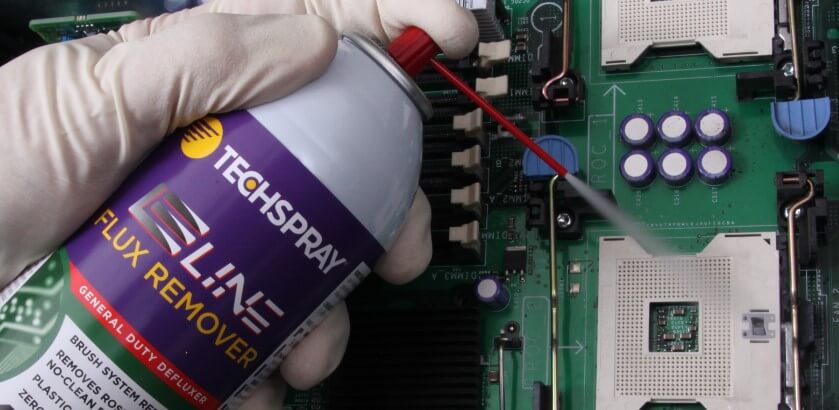
- If using rosin activated flux, aqueous flux, or if the aesthetics of the flux residue is a problem, clean the area with a flux remover.
Associated products:
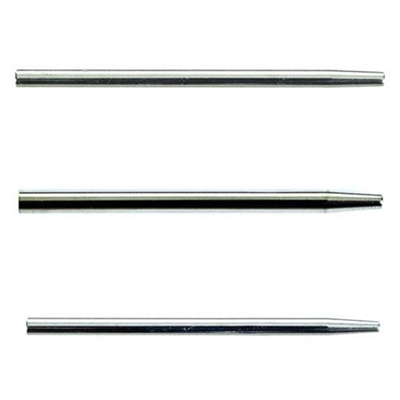
- Plato soldering tips
- Plato shear lead cutters
- Techspray G3 Flux Remover
- Techspray E-LINE Flux Remover
How hot do I set the solder iron?
600°- 650°F (316°- 343°C) is a good place to start for lead-based solder and 650°- 700°F (343°- 371°C) for lead-free solder. You want the tip hot enough to melt the solder efficiency, but excess heat can damage components as the heat travels along the leads, and it will reduce the lifespan of the soldering tip.
How do I tell a good solder joint from a bad one?
Inspect the solder joint to make sure there is full coverage over the contact area and lead. Some things to watch out for:
- If it is a thru-hole lead, the hole should be filled and the solder joint forms a slight pyramid-like shape.
- If it is a surface mount’s solder joint, the solder should fully cover the contact pad and surround the lead.
- The lead should not be loose or wiggle once it is soldered.
- The solder shouldn’t overflow or bridge onto other contact points/pads.
- If using lead-based solder, the solder joint should be shiny. Unfortunately, lead-free tends to have a duller finish, so shininess is not a good indicator in that case.
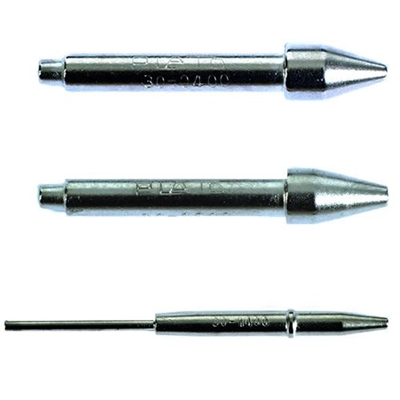
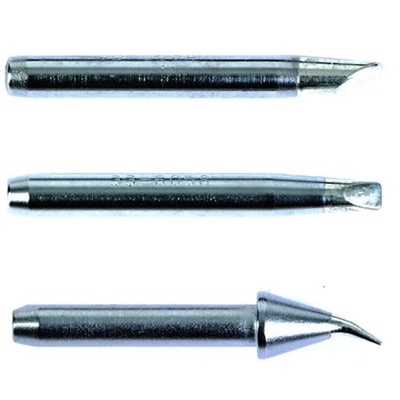
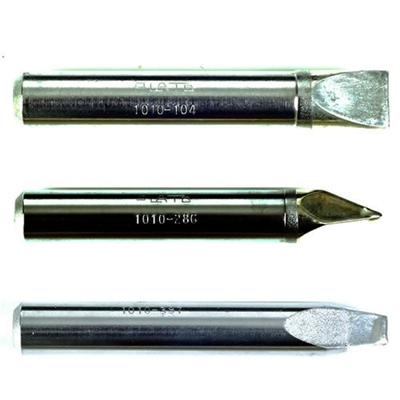
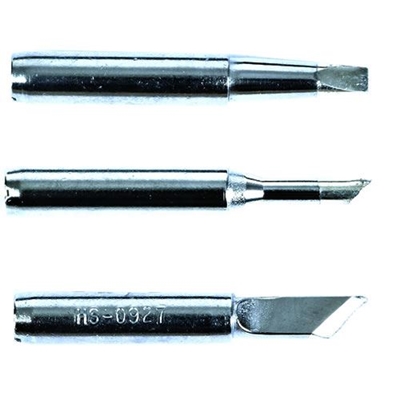
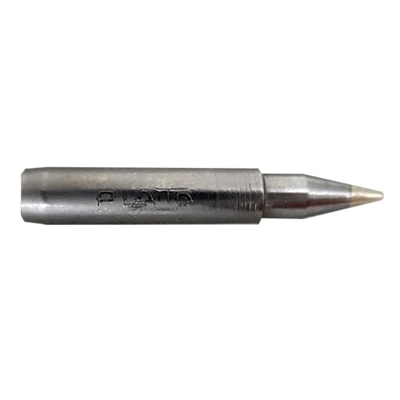
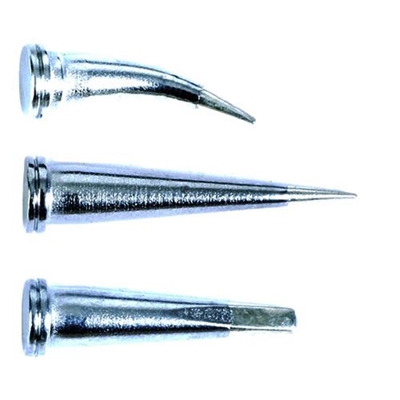
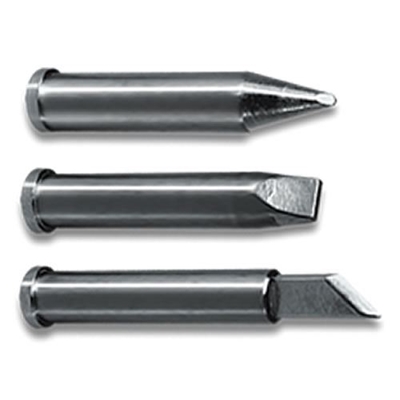
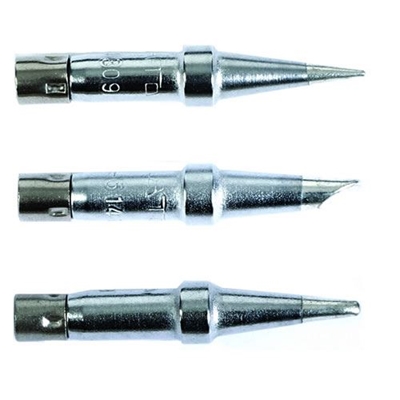
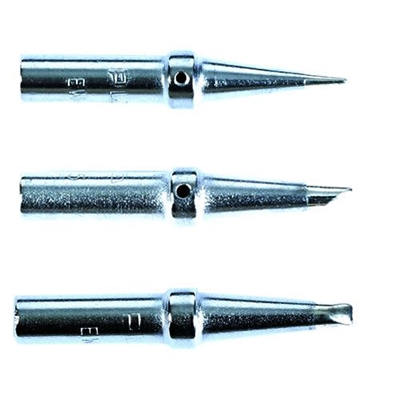
How do I select the best soldering tip for my PCB repair job?
The goal is to match the tip shape and size to the contact pad. This allows you to maximize the contact surface area, so that you heat the lead and contact area as quickly as possible. If you choose a tip that is too large, you have more tip volume to heat, which will slow down the heat recovery - the time it takes for the tip to reheat after soldering a joint. It also runs the risk of interfering with other components and contact areas. If you choose a tip that is too small, you won’t have enough surface area of the tip in contact with either the lead or the contact area to transfer heat efficiently. It will take more dwell time, which slows you down and could increase the thermal stress of the component.
Make sure you are using a soldering iron and tips intended for electronic PCB soldering. Tips intended for other applications, like stained glass, plumbing, or heavy electrical work, are generally much larger than what is appropriate for electronics.
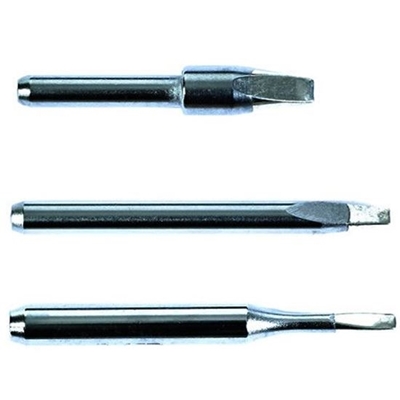
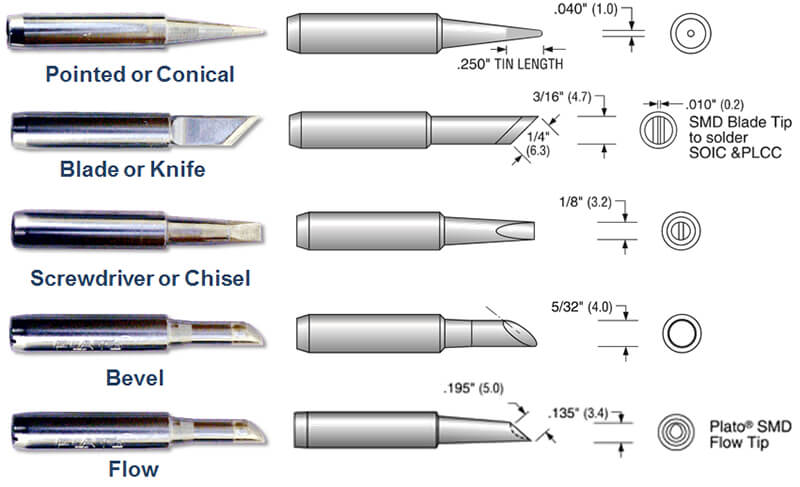
Soldering tips come in all kinds of shapes to facilitate different PCB geometries:
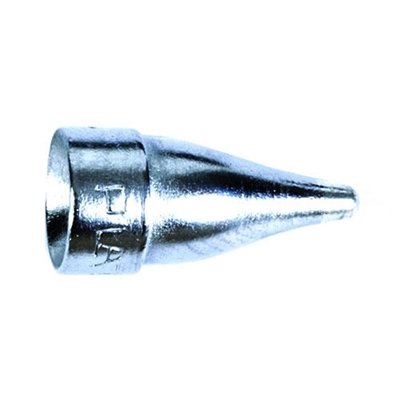
- Pointed or conical – The end of the soldering tip comes to either a point or a round the flat area. The size is specified by the diameter of the end, so it can range in size from 0.1mm to 1mm, or larger. These tips are generally used when pin-point accuracy is needed, like with very fine leadless surface mount components. They may be long for greater reach in dense board design, or have a shorter microtip to reduce the amount of tip metal that needs to be heated. This can improve heat recovery. The ends of the tips may also be bent to avoid interfering with other components or contact areas.
- Blade or knife – A blade tip is usually used for drag soldering when the solder is drawn across multiple contact pads. This is common when soldering surface mount technology (SMT) components. The size is measured along the length of the blade and can be 6.3mm (1/4”) or larger.
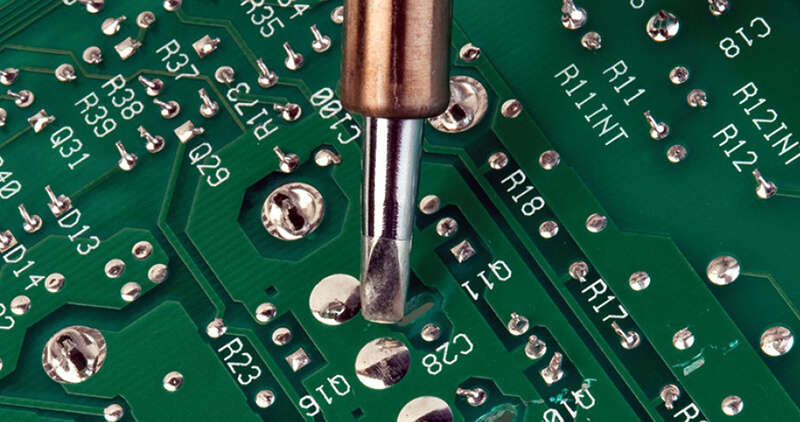
- Chisel or screwdriver – A chisel allows you to heat a larger contact area, so it is useful for thru-hole solder joints. Lengths may vary and can also be bent, like with a conical tip. The size is mainly specified as the length of the flat area, but the depth or thickness of the tip may also vary. These can be so small that they almost look like a point, like under 1mm, and as wide as 5 or 6mm.
- Bevel – A beveled tip has a flat oval end set at an angle. Picture a metal rod that is a cross section at an angle. The size is specified by the diameter of the “rod” or shaft and sometimes the angle of the bevel. A bevel can range from 1mm to 4mm, or even larger.
- Flow tips – A flow tip looks similar in design to a beveled tip, but instead of a flat area, it is a little indention or cup. This is also called a “mini-wave tip”, and is commonly used for drag soldering, as explained above.
Associated products:
Is it ok to set the heat at maximum temperature to speed up soldering?
In soldering, like everything else, speed is king. Operators will turn up the soldering temperature to speed up heat throughput. This allows them to go from one solder joint to the next faster. The catch – the higher the heat, the shorter the tip life. Sure, solder stations may go up to 900°F, but 750°F is the highest you need to go for a lead-free wire. The extra heat can also unnecessarily stress components, increasing the chances of PCB failure later.
Why is the solder dripping off the soldering tip?
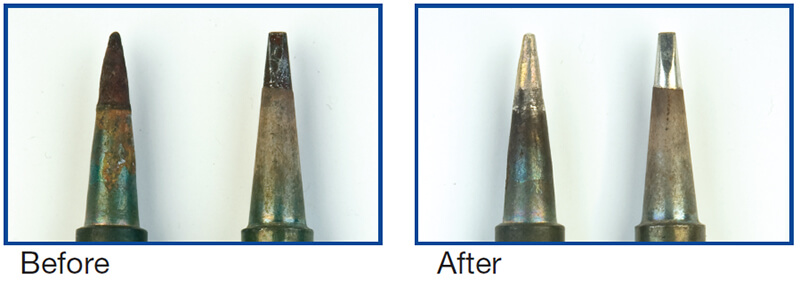
That is an indication that the soldering tip needs to be cleaned, so it is a “cold” tip (although it is still very hot, so don’t touch!). When flux and oxidation build up over time, the heat does not transfer as effectively and the solder doesn’t wet, or flow over the tip properly. The solder will tend to melt but just drip off the tip. This makes it difficult to move in order to solder around contact areas the way you may need it.
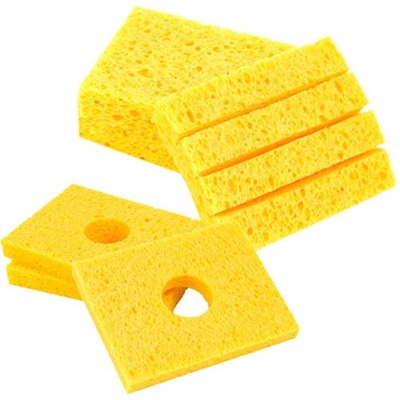
How to clean a soldering iron?
Solder stations normally come with a sponge and/or brass “brillo” pad. The purpose is to remove excess flux and solder from the tip. If too much flux builds up and burns onto the soldering tip, it will eventually dewet and be unusable (but not necessarily unrecoverable). Unless the tip cleaning tools are used properly, they can do more harm than good. When choosing a sponge, make sure it is made of natural cellulose (like Plato replacement sponges). Synthetic sponges will melt onto the soldering tip and can shorten tip life. Use clean DI water. Tap water may include minerals that can build-up on the tip. When you saturate the sponge, wring it out so that it is not dripping wet. Too much water can increase the thermal stress of the tip, and slow down tip recovery.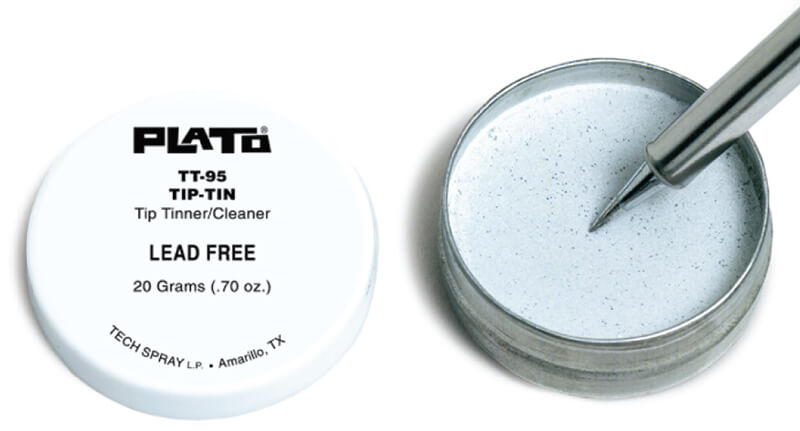
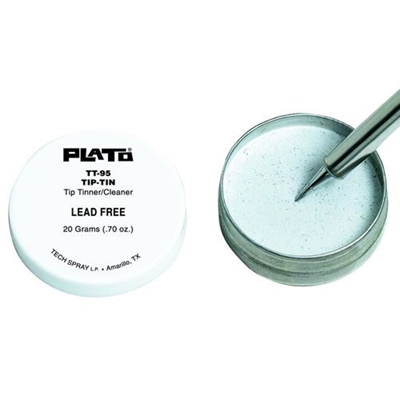
When the soldering tip has turned black from baked on fluxes and no longer wets properly, it is time for the cleaning tools of last resort. Tip tinner (Plato #TT-95) is a combination of lead-free solder and cleaner. While the soldering iron is at full temperature, roll it in the tip tinner. As you roll it, it should change from black to shiny silver as the baked flux is cleaned off. Then wipe off the excess tip tinner from the soldering tip, and re-tin using wire solder. Don’t let the name fool you – “tip tinner” is not intended to be left on the tip.
Polishing bars are also available and are used to scrub the tip clean of flux residues. This should only be used as a last resort because you will be removing iron along with the burnt flux. Once a tip shows pitting - actual holes in the iron - it is time to be replaced.
Associated products:
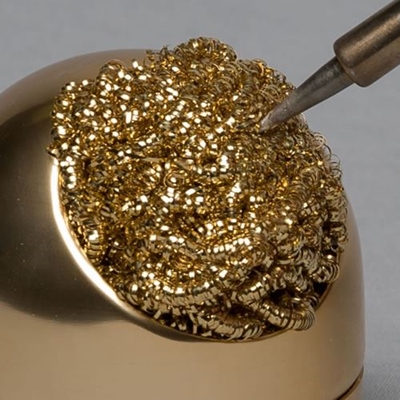
Is a brass “brillo pad” or sponge better for cleaning soldering tips?
Like everything else, there are pros and cons to each:
Brass Tip Cleaner
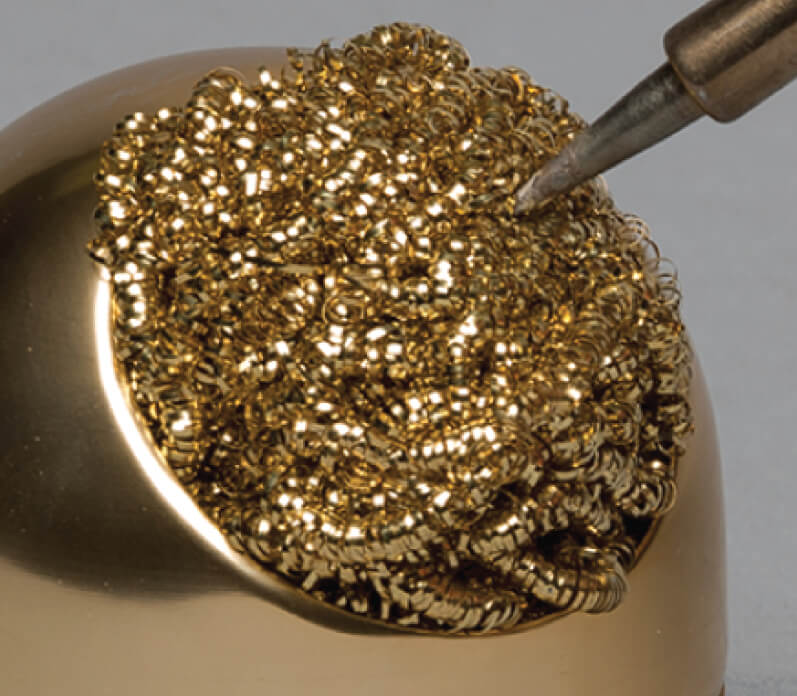
- Pro-Fast and easy to use, doesn’t require saturating with water, and doesn’t thermally shock the soldering tip.
- Con – It is abrasive, even though brass is softer than the iron on the end of the tip. It has more of a tendency to scratch the chrome plating, which keeps the solder from wetting up the tip. That could allow corrosion to creep in under the plating, reducing the lifespan of the tip.
Remember to use a jabbing motion using a brass tip cleaner. Wiping across the surface increases the likelihood of flinging molten solder.
Cellulose Sponge

- Pro – It is an effective and fast way to clean a tip. They come with different holes or slits to make it even faster and easier, and to avoid flinging molten solder.
- Con – Cools down the tip, so requires the tip to heat up again. It also can thermally shock the tip, especially if the sponge is overly saturated. This can shorten the tip life by creating micro-fractures in the iron plating.
Should I clean all the solder off the soldering tip after I’m finished soldering?
It is a common practice to wipe down the soldering tip before putting it back into its holder. This exposes the raw iron on the working end of the tip, which will rust in the open air. Add any residual flux to the mix, and you have a prematurely pitted soldering tip. Before taking a break or stopping for the day, wipe off residual flux and solder, and re-tin by applying fresh solder to the end of the tip.
What can I do to increase soldering tip life?
Since the move from lead to lead-free solders, a common complaint has been short tip life. The higher heat needed for lead-free solders and flux combined with greater activity leads to faster tip burn-out. Often the tips turn black, the solder beads and just drips off the end of the tip. It may also be referred to as a “cold tip”, but take care not to touch it with your bare fingers!
Soldering tips have a copper core that transfers heat from the heating element to the working end (tip of the tip). Because copper is very soft and easily corroded and worn away, other metals are used to plate over the copper, including an outer layer of iron. Although iron is very hard, it will still corrode eventually. In addition, it can be coated with flux and other soils, which can cause dewetting. Corrosion and dewetting will slow down soldering and eventually necessitate scrapping the tip. Although all tips will have their day in the trash bin, there are several steps an operator can take to increase tip life:
- Turn down the heat
- Properly clean the tip
- Tin the soldering tip
- Use special cleaning tools
When leaving the solder station for anything over 5 minutes, turn it off. When you leave the station turned on, the tip remains at soldering temperature, further reducing tip life. Modern soldering equipment heats up to a soldering temperature in seconds, so the time savings is not worth the reduction in tip life.
Associated products:
When should I throw away an old soldering tip?
When the tip is black and dewetting (solder doesn’t cling to it), called a “cold tip”, it can generally be cleaned and used again. Once there is pitting and visible corrosion, it is time for a new tip. The outside of a soldering tip is plated with iron over the thermally conductive copper center. This protects the soft, corrosion-prone copper from the harsh fluxes. Once flux gets through the iron plating through pits, the tip will be eaten away quickly.
How can I avoid corrosion on the PCB after I’m finished soldering?
Flux residues can cause dendritic growth and corrosion on PCB assemblies, so make sure you’re using best practices and cleaning the board. After all, the components have been replaced and excess solder removed…
- Clean the area thoroughly with a quality flux remover.
- Angle the board to allow the cleaner and residues to run off.
- If needed, use a horsehair brush or lint-free wipe to gently scrub the PCB, and then follow with a rinse.
- If using a wipe, make sure it doesn’t leave fibers/lint on your PCB, which may cause issues later.
This is an optional step for no-clean flux, but still a good idea for densely populated or high voltage boards. It is absolutely required, regardless of the flux type, if you plan to follow your repair with conformal coating.
Associated products:
10 tips to good soldering
- Start with a clean surface.
- Match the size of your wire solder to what you are soldering.
- Match your soldering tip to what you are soldering.
- Select your solder and flux carefully.
- Keep your tip clean and tinned.
- Select a soldering temperature that is hot enough to efficiently melt the solder, but not too hot.
- Hold the soldering tip to the lead and contact point/pad until both are brought up to temperature.
- Apply enough solder to cover the contact pad and surround the lead.
- If necessary, trim your leads with a sharp shear lead cutter, and don’t trim into the solder joint.
- Clean flux residues from the soldering area with a quality flux remover.
Associated products:
- Plato soldering tips
- Plato shear lead cutters
- Techspray G3 Flux Remover
- Techspray E-LINE Flux Remover
That concludes our Ultimate Guide to Electronic Soldering. Still have questions about which soldering products are best for your applications? Contact us at 678-819-1408, or send us a message here.